How I Track my Expenses with Ledger
Throughout my childhood and adolescence I've never had to worry about money. Having enough money to buy the things I wanted like games and books, I never really cared too much about it, dismissing as if it were not that important. As I'm growing older however I'm realizing more and more the crucial role played by money in our society.
I believe that the fear of losing all money and possessions is probably one of the most powerful force present in the world today. I also believe that the key aspect to focus on is not in how much money you have at any one time in your life, but is rather in how you manage that money. You may be lucky with some project, with a new job, and you may make a significant amount of money. But then, if you have no structure in place, no process which helps you to manage that money, you will most likely waste it without even noticing.
I still have no idea how money should be managed, especially in large amounts, but following this idea of structuring the management of money, I started to look into tools and systems that could help me track the expenses I made everyday. In this blog post I want to share with you a specific tool I found named ledger as well as the system I implemented in my life for expenses-tracking.
Ledger: Expenses in Plain Text#
From the official site we immediately read
Ledger is a powerful, double-entry accounting system that is accessed from the UNIX command-line. Ledger, begun in 2003, is written by John Wiegley and released under the BSD license. It has also inspired several ports to other languages.
So, to gain a general idea of ledger, let's start from explaining briefly what double-entry accounting is all about.
Double-Entry Accounting#
The basic idea of double-entry accounting is to track the flow of money using 5 main accounts, which are:
- Assets: contains what you have.
- Expenses: contains what you spent.
- Income: contains what you've earned.
- Liabilities: contains what you own.
- Equitiy: contains what you're worth.
Each account can also contain more than one sub-account in order to further specify what you're referring to. For example if we want to specify "expenses that are related to food", we can use the sub-account Expenses:Food.
Having defined these entities, each transaction is then described as a movement of money from one of these account to another. Consider for example when you pay to fill your car with fuel. Using the ledger-format we could write this transaction in the following way
2020/11/19 * Fuel EUR
    Expenses:Fuel                              17.27 EUR
    Assets:CheckingAccount                    -17.27 EUR
As we can see, the date is written in the format yyyy/mm/dd, followed by a * and then by a short description of the transaction. Finally, we list all of the the accounts involved in the transaction, each with a specific "contribution", that is, how much money is going into the account or how much money is going away from the account. In this case there are only two accounts, and we put a + 17.27 EUR on the Expenses:Fuel account to represent that we are making an expense, while to tell how we have paid for that expense we have to put a - 17.27 EUR on the Assets:CheckingAccount, which in this example represents our main banking account.
The crucial thing to notice is that if you sum up the two rows you get a total of $0$. Double-entry is made to work this way: if we sum the single entries of each transaction we must get a $0$, no matter what. If that does not happen then we can be sure that we've made a mistake somewhere. Something pretty damn important to know, considering we're dealing with money. Our money.
Even though this may seem complex, to get the general idea you just have to see a bunch of different transactions and the way they are written down:
- Basic restaurant expense
This one is essentially the same as the previous one, with the only difference being on the specific type of expense made.
output2020/11/18 * Romanina Roadhouse Expenses:Food:Restaurant 18.20 EUR Assets:CheckingAccount -18.20 EUR - Opening balance
To set your initial financial state you can take money from the account
Equitiy. This sets up our banking account with an initial amount of money that we can then use to buy things. Personally I've only had to use the equity account once: for the initialization process and that's it.output2041/12/31 * Opening Balance Assets:Checking 1000.00 EUR Equity:OpeningBalances -1000.00 EUR - Monthly income
To add the income you get from your job, you can write this transaction. As we can see, we "subtract" money from Income, to put them into our checking account.
output2041/01/31 * Salary Income:Salary -1337 EUR Assets:CheckingAcccount 1337 EUR - General shopping
Each transaction can have multiple rows, each of which identifies a particular account. Once again, the only requirement is that if you sum the amounts in each rows you get a total of 0.
output2041/01/31 * Shopping Expenses:Book 25 EUR Expenses:Food 40 EUR Assets:CheckingAcccountNOTE WELL: In the previous transaction we have not written
- 65 EURon the accountAssets:CheckingAccount. This was done intentionally, because ledger understands automatically that the money have to be subtracted from that account. This is of course a special case in which we only have one "blank" account. If you leave more than one row blank without specifying the amount of money, ledger will complain. - Liability
If someone buys you something, and thus you own them some money, you can keep track of that as follows
output;; Friend brought me an app 2020/05/09 * Apple shopping Expenses:Software:iOS Apps 4.49 EUR Liabilities:Claudioand then, sometime later, you can pay your debt as follows
output;; debt paid 2020/10/09 * Debt Liabilities:Claudio 4.49 EUR Assets:CheckingAccount -4.49 EURNotice that after this we have emptied the account
Liabilities:Claudio, which means that we no longer own money to Claudio.
Having briefly introduced the idea of double-entry, we can now focus more on the specific functionality offered by ledger.
The .ledger format#
The powerful aspect of ledger is the fact that it works on simple plain text files. This means that the .ledger format is just a .txt file with the transaction written with the syntax already shown, one after another.
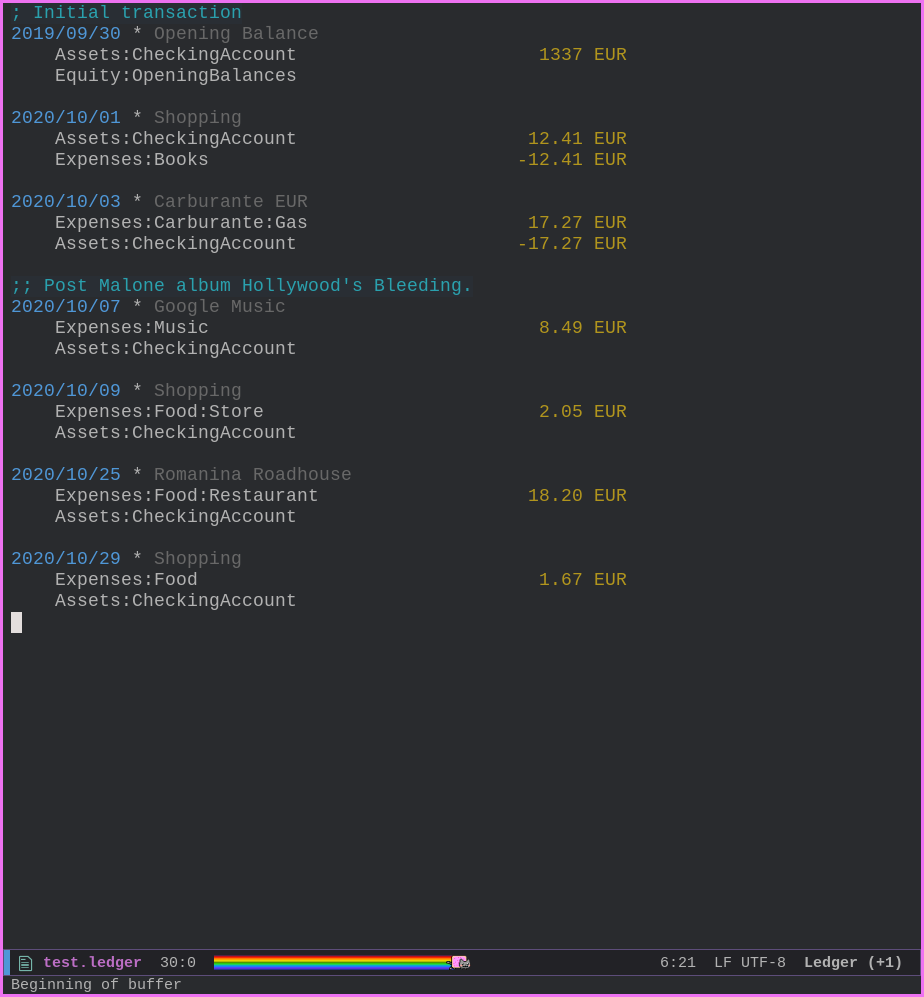
Having this plain-text based approach has considerable benefits, some of which are:
- Since its extremly simple to read plain-text files, you can read your transactions with any program you desire. You can even write your own programs to manage and process your transactions. This is exactly what I did, as you will shortly see.
- You are not relying on specific proprietary encodings that may break and change over-time. This means significant persistence and consistency of data.
There's actually a lesson to be learnt here: use plain-text as long as you can get away with it, because technology is already extremely complex, and we should not make it even more complex. The more you get used to this idea and the more you realize the advantages of plain-text based approaches.
Using Ledger CLI#
Once you have written your transactions in a text file, you can use the ledger cli to do various things, such as running monthly balances or checking how much was spent for fuel, or for books, or things of the sort.
Let us now see some quick examples.
- How much did I spend last october?sh
ledger -b "last oct" bal ^Expenses --invert -f test.ledger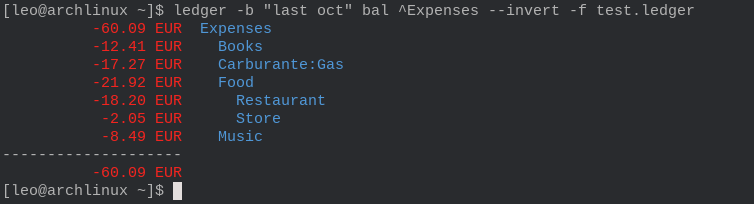
- How much did I spend for fuel?sh
ledger reg Carburante -f test.ledger
There are many more commands of the sort, each of which enables you to extract the specific data you wish to see and analyze.
Ok, in terms of general ledger discussion this is it. To finish off the blog post I'll now mention the way I use it in my everyday life.
My Workflow#
As always, I require mainly two things from a workflows if I want to really use it:
- it must be secure;
- it must be efficient;
The workflow I've been testing since July can be described as follows: whenever I make a transaction I immediately take note of it on my iPhone using an application called XpenseTracker. At the end of the month I transfer all the transactions made in the entire month to my personal computer in a .csv format. For this step you can really use any technology; I personally use signal. Once I have the .csv data on my computer, I use a python script to convert the data in the ledger format. Finally, I check the transactions manually to see if there are errors and also to mentally recap how I spent my money in the last month. If everything looks legit, I copy all the transactions to my main ledger file, which is encrypted using gpg.
Other workflows may make use of the data that the bank generates, but I prefer to have my own classification for each type of transaction. To do this however the mobile app becomes a necessity, since when I make a transaction I'm usually on the go, with just my smartphone.
XpenseTracker#
The application I found for keeping track of the expenses I made on the go is called XpenseTracker, and overall its a pretty good app. It has a bunch of cool features, such as:
- Creation of different logs, each of which is then treated individually. /img/tech/ledger-intro/xpensetracker_app_01.jpg
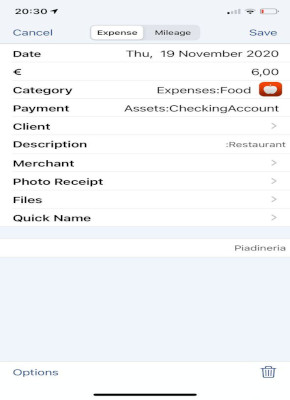
- Creation of single transaction with specific data elements, such as
date,cost,payment,category, and so on. /img/tech/ledger-intro/xpensetracker_app_02.jpg - Definition of templates that enable you to create quick-transactions when you need them. /img/tech/ledger-intro/xpensetracker_app_04.gif
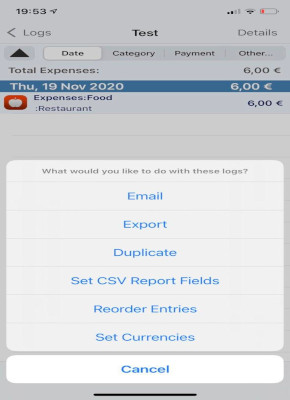
- Each log created can then be exported in
.csvformat. The app also allows you to define which fields must be present in the.csvformat and in which order. This is crucial because the python script that translates the data from.csvto.ledgermust know the specific order of the various elements of the transaction. /img/tech/ledger-intro/xpensetracker_app_05.jpg
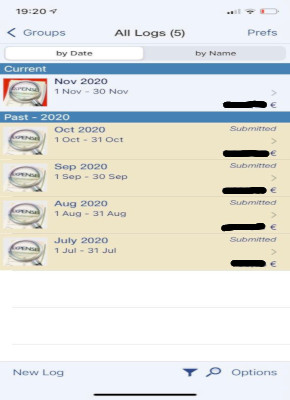
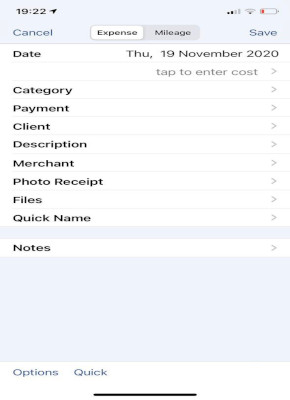
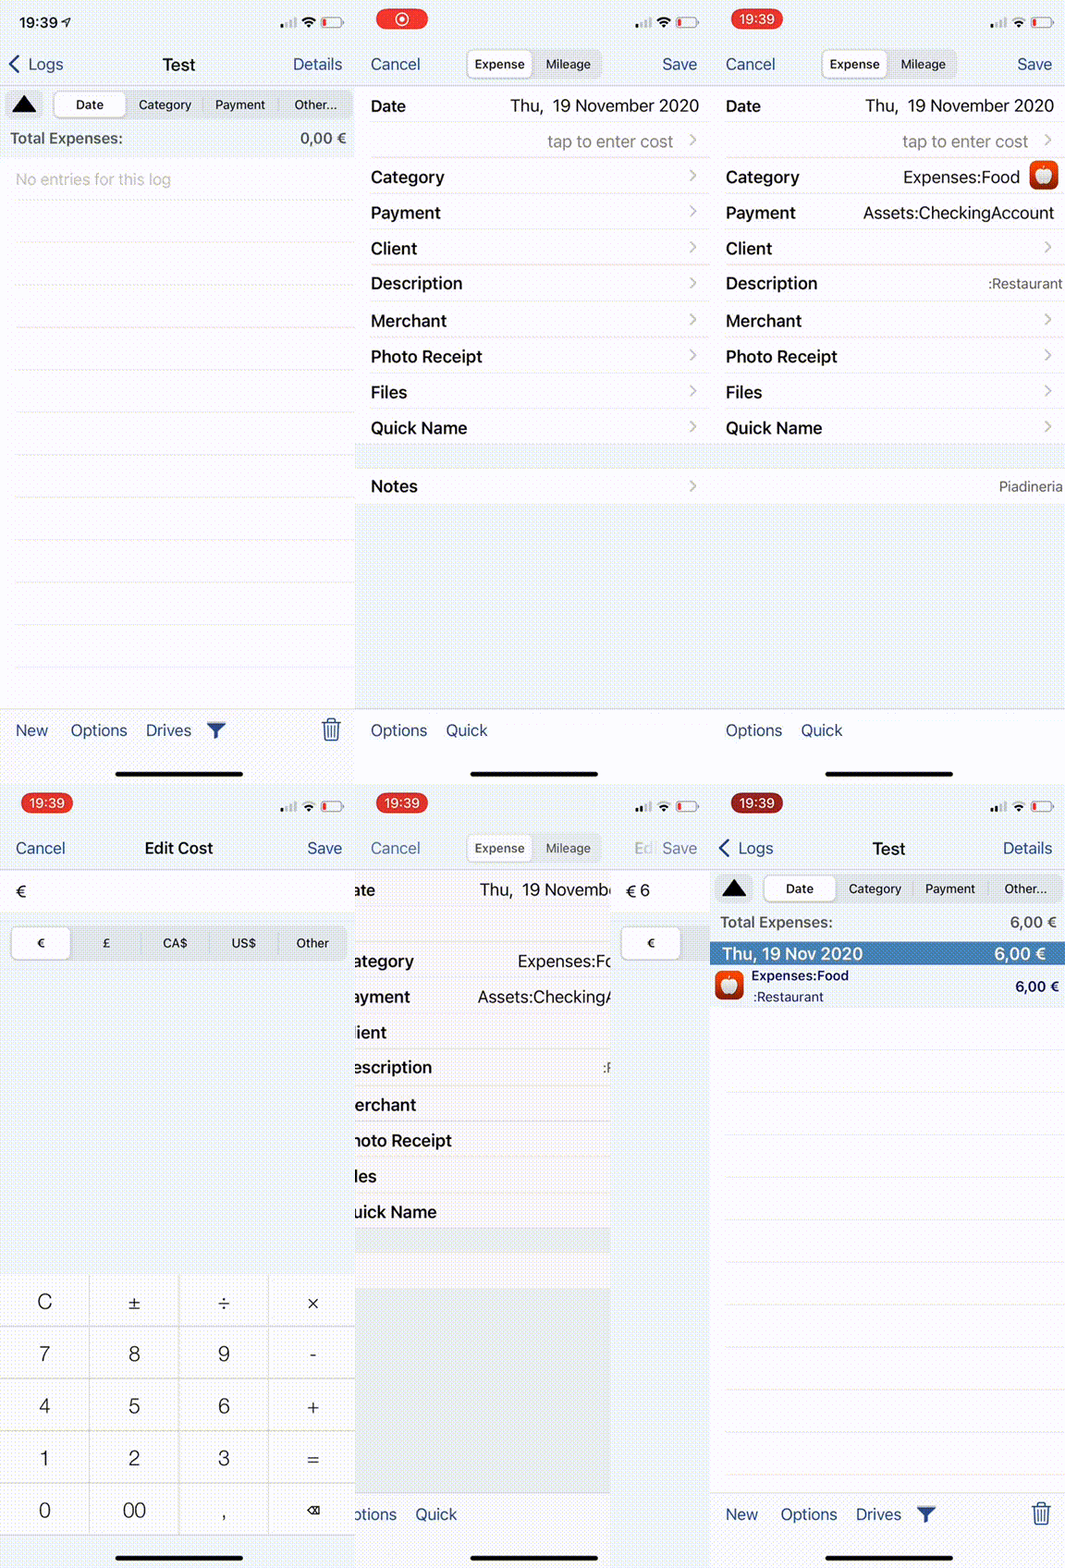
The only "complain" that I have with the app is the fact that it limits you in the specializations of the different accounts. This means that the app only allows you to specify that you have a food expense, with the usual Expenses:Food, but it doesn't allow you to add further informations, like for example if you are eating at a restaurant and want a more specific Expenses:Food:Restaurant. This initially created some problems for me, but I found a hackish solution to my problem: whenever I want to specify further the type of account I'm using, like :Restaurant, I use the additional Description field and then in the python script I concatenate the two strings, thus obtaining the wanted final result.
Python script to convert .csv into .ledger#
To finish off, this is the python script mentioned before.
# This function reads all transactions written in transactions_file
# (CSV format) and concatenates them in a single string, which is the
# result returned
def generate_transactions(transactions_file):
    result = ""
    with open(transactions_file) as csv_file:
        csv_reader = csv.reader(csv_file, delimiter=",")

        for row in csv_reader:
            # get data from csv
            raw_date = row[0].split("/")
            date = raw_date[2] + "/" + raw_date[1] + "/" + raw_date[0]

            price = row[2].replace(",", ".") + " " + row[1]
            category_1 = row[3] + row[4]
            category_2 = row[5]
            description = row[6]

            # compute white spaces required
            white_space = " " * (48 - (len(row[2]) - 4) - (4 + len(category_1)))

            # write transaction
            result += date + " * " + description + "\n"
            result += "    " + category_1 + white_space + price + "\n"
            result += "    " + category_2 + "\n"
            result += "\n"
    return result